I know, Christmas feels like ages away, but it will be upon us very soon. I love everything about it, but especially decorating and covering my home with colour and light. This woodland Santa has come back to the shop with me for a few adjustments before he sets up home in the window, and he is holding the new baubles I have made, for your enjoyment. The pattern is below. Pop along to my Facebook page for the giveaway to win one of my finished baubles.
And watch out for the stars. Literally. I have stars as well.
Christmas Bauble
This pattern fits an 8cm/3″ flattened bauble (mine were ones meant for photos)
Yarn of your choice, DK
4mm hook
Scissors
Darning needle
To begin:
Make 2
Chain 4, and join into a circle with a slip stitch.
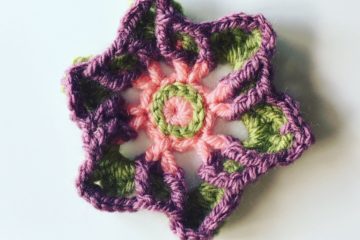
Round 1: Ch2, 1tr, ch2. Then 2tr, ch2 around to make a total of 6 clusters of 2tr and 6 ch2 sps. Join to the 2nd ch of the initial ch2, and fasten off.
Round 2: Join a new colour in any ch2 sp. Ch2, 1tr, ch2, 2tr all in the same space. Then *2tr, ch2, 2tr* in each ch2 sp around, for 6 v st clusters, with no spaces between. Join to 2nd ch at beginning and fasten off.
Round 3: Join a new colour in and ch2 sp. Ch2, 1tr, ch2, 2tr in the same space. In the space between the next two clusters of the previous round, make 2tr (this isn’t a space really, as we didn’t add any chains, but there’s plenty of room for your little cluster). *2tr, ch2, 2tr in corner space, then 2tr in next (non) space between the next two clusters of the previous round.* Repeat around for 6 ‘corners’ and 6 middle clusters. Join. Fasten off.
Round 4: Join new colour in any corner space. Ch1, 3dc in same space. This round is worked into the stitches as follows, *1htr, 1tr, 1dtr, 1dtr, 1tr, 1htr, 3dc in corner* Repeat round, and join to the first dc of the beginning 3. Fasten off. Sew in ends.
Make sure you don’t miss the first tr to work into after the dcs in the corner. I have marked it in the top middle picture below with my orange needle. The final round makes the hexagon into more of a circle, and comprises six stitches, 1htr and 1tr in the first cluster, 2 dtrs in the second cluster, and a tr and a htr in the final cluster to even it up again.

Place the two completed circles together, wrong sides facing, and with a new colour, begin to join them with double crochet all the way around. You can start with a ch1 if you like, or a standing dc. (Begin with a slip knot on your hook, put the hook through the first stitch to be worked, yo and bring through; 2 loops on hook; yo, and bring through both.)
It’s quite tricky to sew around the bauble, so begin working with the circles on their own. You can crochet around a little over half before you need to slot it in. Complete the crochet around, fasten off, and sew in the ends.
The baubles I bought had nice red velvet ribbon on already (score!). They came from B&M, and were a bargain. You may need a pair of tweezers to get the
cardboard out though!
I hope you like my pattern. Please don’t sell it or copy it as your own. I know there isn’t much that’s new in the world of grannies, but I took the trouble to work it all out for myself, and write it down to share with you. And take photos and all the rest. I’d love for you to use it – they make great teacher gifts – but please link to my post rather than paste. Many thanks. If anything is unclear, do ask! Writing down all the trs and dtrs can make one’s eyes go funny (and mine are very funny already right now!).
I would love to see your makes – so please send me a pic. On here, or the Facebook, or tag me on insta or whatever.


0 Comments